FREE UK Standard Delivery. EU shipping now just £14.95.
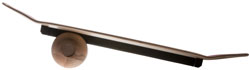


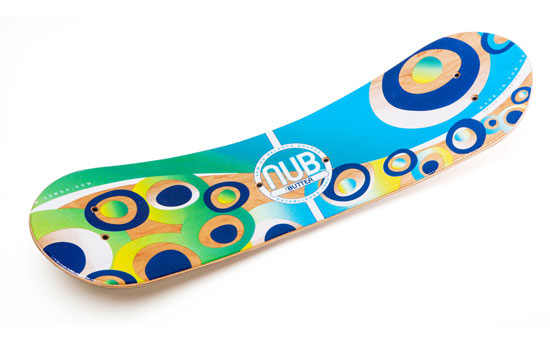
Vew-Do Balance Board Push Up Challenge: Beginner

Push-ups on a Vew-Do Pickle or Butter NUB is a great upper body or core workout. Follow the week plan below and in just 6 weeks you will not only be feeling great, but you'll have put on some serious muscle just in time for Spring! This is the Beginner plan, if you are looking for something harder check our the Intermediate Plan or Advanced Plan.
Step 1: Put your palms flat on the ends of your NUB balance board or grip the edge of the board. Your feet can be together or a bit wider and parallel to each other if that's more comfortable.
Step 2: Look forward, keep your body in a straight line from head to toe without sagging in the middle or arching your back.
Step 3: Lower your body slowly towards the floor. Do not rush, take your time. Bend your arms and keep your palms in fixed position.
Step 4: Raise body up off floor to back to starting position by extend arms with body straight, pause for a moment at the top.
WEEK 1 - SUNDAY / TUESDAY / FRIDAY
Allow yourself around 60 seconds per set.
Day 1 - 5 Sets
Warm up - 30 Seconds
2 Push-ups - 60 Second Cooldown
2 Push-ups - 60 Second Cooldown
3 Push-ups - 60 Second Cooldown
2 Push-ups - 60 Second Cooldown
4 Push-ups - 60 Second Cooldown
Day 2 - 5 Sets
Warm up - 30 Seconds
3 Push-ups - 60 Second Cooldown
2 Push-ups - 60 Second Cooldown
4 Push-ups - 60 Second Cooldown
3 Push-ups - 60 Second Cooldown
5 Push-ups - 60 Second Cooldown
Day 3 - 5 Sets
Warm up - 30 Seconds
4 Push-ups - 60 Second Cooldown
5 Push-ups - 60 Second Cooldown
4 Push-ups - 60 Second Cooldown
5 Push-ups - 60 Second Cooldown
6 Push-ups - 60 Second Cooldown
WEEK 2 - SUNDAY / TUESDAY / FRIDAY
Allow yourself around 60 seconds per set.
Day 1 - 5 Sets
Warm up - 30 Seconds
4 Push-ups - 60 Second Cooldown
6 Push-ups - 60 Second Cooldown
6 Push-ups - 60 Second Cooldown
4 Push-ups - 60 Second Cooldown
8 Push-ups - 60 Second Cooldown
Day 2 - 5 Sets
Warm up - 30 Seconds
6 Push-ups - 60 Second Cooldown
6 Push-ups - 60 Second Cooldown
4 Push-ups - 60 Second Cooldown
5 Push-ups - 60 Second Cooldown
9 Push-ups - 60 Second Cooldown
Day 3 - 5 Sets
Warm up - 30 Seconds
6 Push-ups - 60 Second Cooldown
8 Push-ups - 60 Second Cooldown
6 Push-ups - 60 Second Cooldown
6 Push-ups - 60 Second Cooldown
10 Push-ups - 60 Second Cooldown
WEEK 3 - SUNDAY / TUESDAY / FRIDAY
Allow yourself around 60 seconds per set.
Day 1 - 5 Sets
Warm up - 30 Seconds
10 Push-ups - 60 Second Cooldown
12 Push-ups - 60 Second Cooldown
8 Push-ups - 60 Second Cooldown
9 Push-ups - 60 Second Cooldown
11 Push-ups - 60 Second Cooldown
Day 2 - 5 Sets
Warm up - 30 Seconds
12 Push-ups - 60 Second Cooldown
13 Push-ups - 60 Second Cooldown
9 Push-ups - 60 Second Cooldown
10 Push-ups - 60 Second Cooldown
12 Push-ups - 60 Second Cooldown
Day 3 - 5 Sets
Warm up - 30 Seconds
12 Push-ups - 60 Second Cooldown
14 Push-ups - 60 Second Cooldown
10 Push-ups - 60 Second Cooldown
11 Push-ups - 60 Second Cooldown
14 Push-ups - 60 Second Cooldown
WEEK 4 - SUNDAY / TUESDAY / FRIDAY
Allow yourself around 90 seconds per set.
Day 1 - 5 Sets
Warm up - 30 Seconds
14 Push-ups - 90 Second Cooldown
15 Push-ups - 90 Second Cooldown
12 Push-ups - 90 Second Cooldown
10 Push-ups - 90 Second Cooldown
16 Push-ups - 90 Second Cooldown
Day 2 - 5 Sets
Warm up - 30 Seconds
15 Push-ups - 90 Second Cooldown
16 Push-ups - 90 Second Cooldown
14 Push-ups - 90 Second Cooldown
12 Push-ups - 90 Second Cooldown
18 Push-ups - 90 Second Cooldown
Day 3 - 5 Sets
Warm up - 30 Seconds
16 Push-ups - 90 Second Cooldown
18 Push-ups - 90 Second Cooldown
15 Push-ups - 90 Second Cooldown
13 Push-ups - 90 Second Cooldown
20 Push-ups - 90 Second Cooldown
WEEK 5 - SUNDAY / TUESDAY / FRIDAY
Allow yourself around 60 seconds per set.
Day 1 - 7 Sets
Warm up - 30 Seconds
10 Push-ups - 45 Second Cooldown
12 Push-ups - 45 Second Cooldown
14 Push-ups - 45 Second Cooldown
13 Push-ups - 45 Second Cooldown
14 Push-ups - 45 Second Cooldown
12 Push-ups - 45 Second Cooldown
22 Push-ups - 45 Second Cooldown
Day 2 - 7 Sets
Warm up - 30 Seconds
12 Push-ups - 45 Second Cooldown
14 Push-ups - 45 Second Cooldown
16 Push-ups - 45 Second Cooldown
12 Push-ups - 45 Second Cooldown
18 Push-ups - 45 Second Cooldown
14 Push-ups - 45 Second Cooldown
26 Push-ups - 45 Second Cooldown
Day 3 - 7 Sets
Warm up - 30 Seconds
14 Push-ups - 45 Second Cooldown
15 Push-ups - 45 Second Cooldown
15 Push-ups - 45 Second Cooldown
12 Push-ups - 45 Second Cooldown
20 Push-ups - 45 Second Cooldown
16 Push-ups - 45 Second Cooldown
30 Push-ups - 45 Second Cooldown
WEEK 6 - SUNDAY / TUESDAY / FRIDAY
Allow yourself around 90 seconds per set.
Day 1 - 7 Sets
Warm up - 30 Seconds
22 Push-ups - 45 Second Cooldown
30 Push-ups - 45 Second Cooldown
20 Push-ups - 45 Second Cooldown
16 Push-ups - 45 Second Cooldown
26 Push-ups - 45 Second Cooldown
20 Push-ups - 45 Second Cooldown
40 Push-ups - 45 Second Cooldown
Day 2 - 7 Sets
Warm up - 30 Seconds
24 Push-ups - 45 Second Cooldown
28 Push-ups - 45 Second Cooldown
30 Push-ups - 45 Second Cooldown
18 Push-ups - 45 Second Cooldown
32 Push-ups - 45 Second Cooldown
28 Push-ups - 45 Second Cooldown
46 Push-ups - 45 Second Cooldown
Day 3 - 7 Sets
Warm up - 30 Seconds
26 Push-ups - 45 Second Cooldown
34 Push-ups - 45 Second Cooldown
32 Push-ups - 45 Second Cooldown
28 Push-ups - 45 Second Cooldown
32 Push-ups - 45 Second Cooldown
30 Push-ups - 45 Second Cooldown
52 Push-ups - 45 Second Cooldown
WEEK 7 - SUNDAY
Now test yourself. Can you do 100 push-ups in 4-5 minutes? Look how far you've come and congratulate yourself! For a fun twist, maybe do all the above weeks outside this spring/summer. You don't need to train indoors, the NUB series is extremely versatile and can handle all conditions well.
Vew-Do Balance Board Push Up Challenge: Advanced

Push-ups on a Vew-Do Pickle or Butter NUB is a great upper body or core workout. Follow the week plan below and in just 6 weeks you will not only be feeling great, but you'll have put on some serious muscle just in time for Spring! This is the Advanced plan, if you are looking for something easier check our the Beginner Plan or Intermediate Plan.
Step 1: Put your palms flat on the ends of your NUB balance board or grip the edge of the board. Your feet can be together or a bit wider and parallel to each other if that's more comfortable.
Step 2: Look forward, keep your body in a straight line from head to toe without sagging in the middle or arching your back.
Step 3: Lower your body slowly towards the floor. Do not rush, take your time. Bend your arms and keep your palms in fixed position.
Step 4: Raise body up off floor to back to starting position by extend arms with body straight, pause for a moment at the top.
WEEK 1 - SUNDAY / TUESDAY / FRIDAY
Allow yourself around 60 seconds per set.
Day 1 - 5 Sets
Warm up - 30 Seconds
10 Push-ups - 60 Second Cooldown
12 Push-ups - 60 Second Cooldown
8 Push-ups - 60 Second Cooldown
8 Push-ups - 60 Second Cooldown
10 Push-ups - 60 Second Cooldown
Day 2 - 5 Sets
Warm up - 30 Seconds
12 Push-ups - 60 Second Cooldown
8 Push-ups - 60 Second Cooldown
8 Push-ups - 60 Second Cooldown
10 Push-ups - 60 Second Cooldown
14 Push-ups - 60 Second Cooldown
Day 3 - 5 Sets
Warm up - 30 Seconds
12 Push-ups - 60 Second Cooldown
14 Push-ups - 60 Second Cooldown
9 Push-ups - 60 Second Cooldown
10 Push-ups - 60 Second Cooldown
16 Push-ups - 60 Second Cooldown
WEEK 2 - SUNDAY / TUESDAY / FRIDAY
Allow yourself around 60 seconds per set.
Day 1 - 5 Sets
Warm up - 30 Seconds
14 Push-ups - 60 Second Cooldown
16 Push-ups - 60 Second Cooldown
10 Push-ups - 60 Second Cooldown
11 Push-ups - 60 Second Cooldown
17 Push-ups - 60 Second Cooldown
Day 2 - 5 Sets
Warm up - 30 Seconds
16 Push-ups - 60 Second Cooldown
18 Push-ups - 60 Second Cooldown
12 Push-ups - 60 Second Cooldown
14 Push-ups - 60 Second Cooldown
19 Push-ups - 60 Second Cooldown
Day 3 - 5 Sets
Warm up - 30 Seconds
17 Push-ups - 60 Second Cooldown
18 Push-ups - 60 Second Cooldown
14 Push-ups - 60 Second Cooldown
16 Push-ups - 60 Second Cooldown
20 Push-ups - 60 Second Cooldown
WEEK 3 - SUNDAY / TUESDAY / FRIDAY
Allow yourself around 60 seconds per set.
Day 1 - 5 Sets
Warm up - 30 Seconds
14 Push-ups - 60 Second Cooldown
18 Push-ups - 60 Second Cooldown
16 Push-ups - 60 Second Cooldown
18 Push-ups - 60 Second Cooldown
22 Push-ups - 60 Second Cooldown
Day 2 - 5 Sets
Warm up - 30 Seconds
20 Push-ups - 60 Second Cooldown
24 Push-ups - 60 Second Cooldown
18 Push-ups - 60 Second Cooldown
20 Push-ups - 60 Second Cooldown
26 Push-ups - 60 Second Cooldown
Day 3 - 5 Sets
Warm up - 30 Seconds
22 Push-ups - 60 Second Cooldown
30 Push-ups - 60 Second Cooldown
22 Push-ups - 60 Second Cooldown
24 Push-ups - 60 Second Cooldown
30 Push-ups - 60 Second Cooldown
WEEK 4 - SUNDAY / TUESDAY / FRIDAY
Allow yourself around 90 seconds per set.
Day 1 - 5 Sets
Warm up - 30 Seconds
22 Push-ups - 90 Second Cooldown
26 Push-ups - 90 Second Cooldown
22 Push-ups - 90 Second Cooldown
20 Push-ups - 90 Second Cooldown
32 Push-ups - 90 Second Cooldown
Day 2 - 5 Sets
Warm up - 30 Seconds
26 Push-ups - 90 Second Cooldown
30 Push-ups - 90 Second Cooldown
26 Push-ups - 90 Second Cooldown
28 Push-ups - 90 Second Cooldown
36 Push-ups - 90 Second Cooldown
Day 3 - 5 Sets
Warm up - 30 Seconds
28 Push-ups - 90 Second Cooldown
34 Push-ups - 90 Second Cooldown
30 Push-ups - 90 Second Cooldown
34 Push-ups - 90 Second Cooldown
40 Push-ups - 90 Second Cooldown
WEEK 5 - SUNDAY / TUESDAY / FRIDAY
Allow yourself around 60 seconds per set.
Day 1 - 7 Sets
Warm up - 30 Seconds
18 Push-ups - 45 Second Cooldown
20 Push-ups - 45 Second Cooldown
24 Push-ups - 45 Second Cooldown
16 Push-ups - 45 Second Cooldown
32 Push-ups - 45 Second Cooldown
20 Push-ups - 45 Second Cooldown
42 Push-ups - 45 Second Cooldown
Day 2 - 7 Sets
Warm up - 30 Seconds
20 Push-ups - 45 Second Cooldown
22 Push-ups - 45 Second Cooldown
26 Push-ups - 45 Second Cooldown
18 Push-ups - 45 Second Cooldown
30 Push-ups - 45 Second Cooldown
22 Push-ups - 45 Second Cooldown
46 Push-ups - 45 Second Cooldown
Day 3 - 7 Sets
Warm up - 30 Seconds
22 Push-ups - 45 Second Cooldown
24 Push-ups - 45 Second Cooldown
24 Push-ups - 45 Second Cooldown
22 Push-ups - 45 Second Cooldown
32 Push-ups - 45 Second Cooldown
28 Push-ups - 45 Second Cooldown
50 Push-ups - 45 Second Cooldown
WEEK 6 - SUNDAY / TUESDAY / FRIDAY
Allow yourself around 90 seconds per set.
Day 1 - 7 Sets
Warm up - 30 Seconds
36 Push-ups - 45 Second Cooldown
40 Push-ups - 45 Second Cooldown
46 Push-ups - 45 Second Cooldown
30 Push-ups - 45 Second Cooldown
48 Push-ups - 45 Second Cooldown
32 Push-ups - 45 Second Cooldown
55 Push-ups - 45 Second Cooldown
Day 2 - 7 Sets
Warm up - 30 Seconds
38 Push-ups - 45 Second Cooldown
44 Push-ups - 45 Second Cooldown
48 Push-ups - 45 Second Cooldown
40 Push-ups - 45 Second Cooldown
50 Push-ups - 45 Second Cooldown
36 Push-ups - 45 Second Cooldown
58 Push-ups - 45 Second Cooldown
Day 3 - 7 Sets
Warm up - 30 Seconds
50 Push-ups - 45 Second Cooldown
46 Push-ups - 45 Second Cooldown
44 Push-ups - 45 Second Cooldown
42 Push-ups - 45 Second Cooldown
56 Push-ups - 45 Second Cooldown
40 Push-ups - 45 Second Cooldown
62 Push-ups - 45 Second Cooldown
WEEK 7 - SUNDAY
Now test yourself. Can you do 100 push-ups in 4-5 minutes? Look how far you've come and congratulate yourself! For a fun twist, maybe do all the above weeks outside this spring/summer. You don't need to train indoors, the NUB series is extremely versatile and can handle all conditions well.
Vew-Do Balance Boards Workout with Battle Ropes for Weight Loss

Battle Ropes offer a great cardio workout as well as full body strength training. You can take them to the next level by using a Vew-Do Pickle NUB, Vew-Do Butter NUB, Vew-Do Zone Fitness board or the LoveYourBrain Rehab system.
Start with 3-4 intervals of the Alternating Wave at 30 seconds on, 30 seconds rest working up to 6 intervals once you get going.
Alternating Wave
Tip: Stabilize your core and plant your feet shoulder-width apart for the best effect. Really work on staying in the squat position the whole time.
- Stand on your board facing the anchor point with feet about shoulder-width apart and knees slightly bent putting you in the squat position.
- With your palms facing in, grab the end of the rope with hand.
- Raise one arm to shoulder level and then quickly lower it while raising the other arm to shoulder level as you do.
- Continue alternating both arms rapidly while balancing and not losing form.

Double Wave
Tip: Need a little bit more? Some people definitely find the Double Wave more challenging.
- Stand on your board facing the anchor point with feet about shoulder-width apart and knees slightly bent putting you in the squat position.
- With your palms facing in, grab the end of the rope with hand.
- Raise both arms to shoulder level and then quickly lower both at the same time.
- Continue moving both arms in unison rapidly while balancing and not losing form.
Thank you Manchester Gym - a full fitness facility located right in the Green Mountains of Vermont!
If your gym or workout facility doesn’t have Vew-Do boards, have them contact us.
Vew-Do Balance Board Push Up Challenge: Intermediate

Push-ups on a Vew-Do Pickle or Butter NUB is a great upper body or core workout. Follow the week plan below and in just 6 weeks you will not only be feeling great, but you'll have put on some serious musle just in time for Spring! This is the intermediate plan, if you need more check out the Advanced Plan or if you need to take a step back try our Easier Plan.
Step 1: Put your palms flat on the ends of your NUB balance board or grip the edge of the board. Your feet can be together or a bit wider and parallel to each other if that's more comfortable.
Step 2: Look forward, keep your body in a straight line from head to toe without sagging in the middle or arching your back.
Step 3: Lower your body slowly towards the floor. Do not rush, take your time. Bend your arms and keep your palms in fixed position.
Step 4: Raise body up off floor to back to starting position by extend arms with body straight, pause for a moment at the top.
WEEK 1 - SUNDAY / TUESDAY / FRIDAY
Allow yourself around 60 seconds per set.
Day 1 - 5 Sets
Warm up - 30 Seconds
6 Push-ups - 60 Second Cooldown
6 Push-ups - 60 Second Cooldown
5 Push-ups - 60 Second Cooldown
4 Push-ups - 60 Second Cooldown
5 Push-ups - 60 Second Cooldown
Day 2 - 5 Sets
Warm up - 30 Seconds
7 Push-ups - 60 Second Cooldown
8 Push-ups - 60 Second Cooldown
6 Push-ups - 60 Second Cooldown
6 Push-ups - 60 Second Cooldown
8 Push-ups - 60 Second Cooldown
Day 3 - 5 Sets
Warm up - 30 Seconds
8 Push-ups - 60 Second Cooldown
10 Push-ups - 60 Second Cooldown
8 Push-ups - 60 Second Cooldown
7 Push-ups - 60 Second Cooldown
12 Push-ups - 60 Second Cooldown
WEEK 2 - SUNDAY / TUESDAY / FRIDAY
Allow yourself around 60 seconds per set.
Day 1 - 5 Sets
Warm up - 30 Seconds
10 Push-ups - 60 Second Cooldown
12 Push-ups - 60 Second Cooldown
8 Push-ups - 60 Second Cooldown
9 Push-ups - 60 Second Cooldown
14 Push-ups - 60 Second Cooldown
Day 2 - 5 Sets
Warm up - 30 Seconds
11 Push-ups - 60 Second Cooldown
12 Push-ups - 60 Second Cooldown
9 Push-ups - 60 Second Cooldown
10 Push-ups - 60 Second Cooldown
15 Push-ups - 60 Second Cooldown
Day 3 - 5 Sets
Warm up - 30 Seconds
14 Push-ups - 60 Second Cooldown
16 Push-ups - 60 Second Cooldown
12 Push-ups - 60 Second Cooldown
14 Push-ups - 60 Second Cooldown
18 Push-ups - 60 Second Cooldown
WEEK 3 - SUNDAY / TUESDAY / FRIDAY
Allow yourself around 60 seconds per set.
Day 1 - 5 Sets
Warm up - 30 Seconds
14 Push-ups - 60 Second Cooldown
17 Push-ups - 60 Second Cooldown
13 Push-ups - 60 Second Cooldown
14 Push-ups - 60 Second Cooldown
19 Push-ups - 60 Second Cooldown
Day 2 - 5 Sets
Warm up - 30 Seconds
16 Push-ups - 60 Second Cooldown
20 Push-ups - 60 Second Cooldown
14 Push-ups - 60 Second Cooldown
16 Push-ups - 60 Second Cooldown
20 Push-ups - 60 Second Cooldown
Day 3 - 5 Sets
Warm up - 30 Seconds
17 Push-ups - 60 Second Cooldown
21 Push-ups - 60 Second Cooldown
15 Push-ups - 60 Second Cooldown
17 Push-ups - 60 Second Cooldown
22 Push-ups - 60 Second Cooldown
WEEK 4 - SUNDAY / TUESDAY / FRIDAY
Allow yourself around 90 seconds per set.
Day 1 - 5 Sets
Warm up - 30 Seconds
18 Push-ups - 90 Second Cooldown
22 Push-ups - 90 Second Cooldown
18 Push-ups - 90 Second Cooldown
16 Push-ups - 90 Second Cooldown
26 Push-ups - 90 Second Cooldown
Day 2 - 5 Sets
Warm up - 30 Seconds
22 Push-ups - 90 Second Cooldown
26 Push-ups - 90 Second Cooldown
20 Push-ups - 90 Second Cooldown
22 Push-ups - 90 Second Cooldown
28 Push-ups - 90 Second Cooldown
Day 3 - 5 Sets
Warm up - 30 Seconds
24 Push-ups - 90 Second Cooldown
28 Push-ups - 90 Second Cooldown
22 Push-ups - 90 Second Cooldown
24 Push-ups - 90 Second Cooldown
34 Push-ups - 90 Second Cooldown
WEEK 5 - SUNDAY / TUESDAY / FRIDAY
Allow yourself around 60 seconds per set.
Day 1 - 7 Sets
Warm up - 30 Seconds
16 Push-ups - 45 Second Cooldown
18 Push-ups - 45 Second Cooldown
20 Push-ups - 45 Second Cooldown
14 Push-ups - 45 Second Cooldown
24 Push-ups - 45 Second Cooldown
16 Push-ups - 45 Second Cooldown
36 Push-ups - 45 Second Cooldown
Day 2 - 7 Sets
Warm up - 30 Seconds
18 Push-ups - 45 Second Cooldown
20 Push-ups - 45 Second Cooldown
24 Push-ups - 45 Second Cooldown
16 Push-ups - 45 Second Cooldown
26 Push-ups - 45 Second Cooldown
22 Push-ups - 45 Second Cooldown
40 Push-ups - 45 Second Cooldown
Day 3 - 7 Sets
Warm up - 30 Seconds
18 Push-ups - 45 Second Cooldown
20 Push-ups - 45 Second Cooldown
22 Push-ups - 45 Second Cooldown
18 Push-ups - 45 Second Cooldown
28 Push-ups - 45 Second Cooldown
26 Push-ups - 45 Second Cooldown
46 Push-ups - 45 Second Cooldown
WEEK 6 - SUNDAY / TUESDAY / FRIDAY
Allow yourself around 90 seconds per set.
Day 1 - 7 Sets
Warm up - 30 Seconds
32 Push-ups - 45 Second Cooldown
38 Push-ups - 45 Second Cooldown
30 Push-ups - 45 Second Cooldown
26 Push-ups - 45 Second Cooldown
34 Push-ups - 45 Second Cooldown
30 Push-ups - 45 Second Cooldown
50 Push-ups - 45 Second Cooldown
Day 2 - 7 Sets
Warm up - 30 Seconds
36 Push-ups - 45 Second Cooldown
46 Push-ups - 45 Second Cooldown
40 Push-ups - 45 Second Cooldown
36 Push-ups - 45 Second Cooldown
48 Push-ups - 45 Second Cooldown
32 Push-ups - 45 Second Cooldown
54 Push-ups - 45 Second Cooldown
Day 3 - 7 Sets
Warm up - 30 Seconds
40 Push-ups - 45 Second Cooldown
44 Push-ups - 45 Second Cooldown
46 Push-ups - 45 Second Cooldown
32 Push-ups - 45 Second Cooldown
50 Push-ups - 45 Second Cooldown
36 Push-ups - 45 Second Cooldown
59 Push-ups - 45 Second Cooldown
WEEK 7 - SUNDAY
Now test yourself. Can you do 100 push-ups in 4-5 minutes? Look how far you've come and congratulate yourself! For a fun twist, maybe do all the above weeks outside this spring/summer. You don't need to train indoors, the NUB series is extremely versatile and can handle all conditions well.
Vew-Do 30 Day Balance Board Plank Challenge

Looking for a fun core work out to try on your new Vew-Do Balance board? Take up our 30 Day Balance Board Plank Challenge and use just your bodyweight and balance board to tone up and push your core muscles to the max.
Most fitness experts will agree that holding a plank for over 120 seconds straight doesn't do any good. This is why some of the routines that have you hold for 300 seconds or more are tests of will and less about fitness. Repeated shorter isometric holds provide better quality muscular contractions, better form, and you just get more out of it. You'll be seeing some impressive results in just 30 days if you add the workout plan below to your workout routine.
Board Used: LoveYourBrain x Vew-Do Rehab System - The cork mat and foam teeter make for a very comfortable workout. You can use any of the other boards in the line, the Pickle and Butter NUB work well for high planks, but you may need to put a towel over the grip if you are using a low plank.
Before you start, test yourself and see how long you can hold a plank with good form on the balance board.
Tip: You can do the exercise below in a plank (arms extended like a push up) or low plank (elbows bent as shown above). For a fun variation to challenge your stability, try lifting one leg off the ground. Be sure to keep good form and alternate legs when needed.
Day 1: Beginner hold for 10 seconds x 3 Sets, Rest 45 seconds | Advanced hold for 30 seconds x 3 Sets, Rest 45 seconds
Day 2: Beginner hold for 10 seconds x 3 Sets, Rest 45 seconds | Advanced hold for 30 seconds x 3 Sets, Rest 45 seconds
Day 3: Rest
Day 4: Beginner hold for 10 seconds x 3 Sets, Rest 45 seconds | Advanced hold for 30 seconds x 3 Sets, Rest 45 seconds
Day 5: Beginner hold for 10 seconds x 3 Sets, Rest 45 seconds | Advanced hold for 30 seconds x 3 Sets, Rest 45 seconds
Day 6: Rest
Day 7: Test yourself again, can you hold good form longer now?
Day 8: Beginner hold for 15 seconds x 5 Sets, Rest 45 seconds | Advanced hold for 35 seconds x 5 Sets, Rest 45 seconds
Day 9: Beginner hold for 15 seconds x 4 Sets, Rest 45 seconds | Advanced hold for 35 seconds x 4 Sets, Rest 45 seconds
Day 10: Beginner hold for 20 seconds x 6 Sets, Rest 60 seconds | Advanced hold for 40 seconds x 6 Sets, Rest 60 seconds
Day 11: Rest
Day 12: Beginner hold for 25 seconds x 4 Sets, Rest 45 seconds | Advanced hold for 45 seconds x 4 Sets, Rest 45 seconds
Day 13: Rest
Day 14: Test yourself, try and keep good plank form and go for it.
Day 15: Beginner hold for 30 seconds x 5 Sets, Rest 45 seconds | Advanced hold for 50 seconds x 5 Sets, Rest 45 seconds
Day 16: Beginner hold for 35 seconds x 5 Sets, Rest 60 seconds | Advanced hold for 55 seconds x 5 Sets, Rest 60 seconds
Day 17: Rest
Day 18: Beginner hold for 25 seconds x 5 Sets, Rest 60 seconds | Advanced hold for 45 seconds x 5 Sets, Rest 60 seconds
Day 19: Beginner hold for 40 seconds x 6 Sets, Rest 60 seconds | Advanced hold for 60 seconds x 8 Sets, Rest 60 seconds
Day 20: Rest
Day 21: Test yourself. Look how far you've come so far!
Day 22: Beginner hold for 45 seconds x 5 Sets, Rest 60 seconds | Advanced hold for 65 seconds x 5 Sets, Rest 60 seconds
Day 23: Beginner hold for 30 seconds x 3 Sets, Rest 45 seconds | Advanced hold for 45 seconds x 3 Sets, Rest 45 seconds
Day 24: Beginner hold for 50 seconds x 2 Sets, Rest 60 seconds | Advanced hold for 70 seconds x 2 Sets, Rest 60 seconds
Day 25: Rest
Day 26: Beginner hold for 55 seconds x 3 Sets, Rest 90 seconds | Advanced hold for 75 seconds x 3 Sets, Rest 90 seconds
Day 27: Rest
Day 28: Beginner hold for 25 seconds x 6 Sets, Rest 60 seconds | Advanced hold for 40 seconds x 6 Sets, Rest 60 seconds
Day 29: Rest
Day 30: Congratulate yourself, you stuck with it! Now test your time and compare it to what we started with.
About Manchester Gym
Located in the Green Mountains of Vermont, The Manchester Gym is the place to be for all your fitness and balance training needs. They offer personal training to get you on the right path, group fitness classes like Zumba, Cardio Boot Camp, Yoga and more; plus they have an impressive weight room with state-of-the-art equipment.
Iron Cross Squat On A Vew-Do Balance Board
Muscle Worked: Shoulders, Quadriceps, Chest, Glutes, Hamstrings, Lower Back and Traps
Tip: Don't start with your normal weight. When adding a balance board to any exercise it's best to begin with less weight and work your way up.
Breath: Everybody forgets to breath when doing these. Inhale as you squat down, exhale as you push back up.
- Start with your feet shoulder width apart comfortably on the board. Hold a dumbbell in each hand.
- With your palms facing forward, extend your arms away from your body till arms and torso form the letter "T". This will be the start position.
- Once you have adjusted to standing on the balance board, squat down slowly by bending at the knees and keeping your back straight like you are going to sit on a chair. Simultaneously bring your arms in front of you until your palms are facing each other and the dumbbells just about touch.
- Hold this position briefly. Adjust your balance and move on to step 5. You will wobble a little; this is not an easy exercise.
- To stand back up, slowly start by pushing on the balls of your feet and work your way up while simultaneously moving your arms out away from your body to again form a letter "T".
- Repeat!


About Manchester Gym
Located in the Green Mountains of Vermont, The Manchester Gym is the place to be for all your fitness and balance training needs. They offer personal training to get you on the right path, group fitness classes like Zumba, Cardio Boot Camp, Yoga and more; plus they have an impressive weight room with state-of-the-art equipment.
Kettlebell Pistol Squats On A Balance Board

Muscle groups targeted: Quadriceps, Glutes, Hamstrings, Calves
Tip: Don't start with your normal weight. When adding a balance board to any exercise it's best to begin with less weight and work your way up. You can't jump right into a full pistol squat on a balance board as a novice or even intermediate-level athlete. This is a great exercise to work your way up to doing it correctly. Start slow, take your time and work on form.
Board Used: LoveYourBrain (Pictured). This works well on all Vew-Do boards because of our unique track system and it works especially well on the Pickle NUB and Butter NUB because of it's built-in rocker and hubs.
Pistol Squats, also called a One-Legged Squat, is a great way to build immensely strong legs while simultaneously training balance, strength, and mobility all with just one simple exercise.


- With one foot standing firmly on the front of a balance board and the other on the ground, pick up a kettlebell with both hands and hold it by the horns in front of your body.
- Raise the foot that is off the balance board off the floor.
- Concentrate on looking directly forward while keeping your chest up and knees slightly bent. Don't forget about your back, it's key to keep it straight while doing these squats.
- Bring the back of the board up so that you are balancing on the front of the board only (traditional board on the track, NUB series on the front NUB). You can either do this trying to balance on the track/NUB alone or with the nose of the balance board fully resting on the ground to make it more stable.
- Extend the Kettlebell away from your body. This will be your starting position.
- Descend into a one legged squat by flexing the knee and sitting back with the hips, holding the kettlebell up in front of you through the entire movement. Take it slow and work on your balance and proper form.
- Hold the bottom position for a second, then reverse the motion by extending through the knee and driving through the heel. Don't stop looking forward and keep your chest and head up.
- Repeat, smile,and then switch sides.
Variations:


- Try with one leg pulled back (pictured above with Position 1 and 2).
- Try holding the Kettlebell closer to the body. This is more advanced and form is very important.
- Try changing your foot position on the board. You don't need to do this with your foot right at the end of the balance board. Some athletes enjoy doing One-Legged Squats/Pistol Squats around 1-3 inches back from the nose of the board.
- Try not to rest the board fully on the ground. On the NUB' s try balancing on that front NUB and on a traditional balance board try to be just on the track without the front of the balance board touching the ground.
- Try with no weight and arms fully extended in front of you.
About Manchester Gym
Located in the Green Mountains of Vermont, The Manchester Gym is the place to be for all your fitness and balance training needs. They offer personal training to get you on the right path, group fitness classes like Zumba, Cardio Boot Camp, Yoga and more; plus they have an impressive weight room with state-of-the-art equipment.
Balance Board Kettlebell Pass Between The Legs
Muscle groups targeted: Abdominals, Shoulders, Glutes, Hamstrings
Tip: Practice this without the board first and get the motion down.
Board Used: LoveYourBrain (Pictured). Can also be done on the Pickle NUB, Butter NUB, and Zone.
This is hard, really hard, but really a fun exercise once you get used to it. It's meant to not only challenge you physically, but also mentally. In the video Lia is doing the hardest version. Going from a 'W' pass to an '8' pass. You can do just W or just 8 if that is more comfortable for you.
If you want to work abdominals and train balance, this is the workout for you.


- Stand on the balance board with a comfortable stance and knees slightly bent.
- Place a kettlebell on the board between your legs.
- Bend forward from the hips and keep your back flat/straight.
- Steady yourself; you will wobble on the board when first learning this exercise.
- Pick up the kettlebell with one hand and pass it to your other hand between your legs in a 'W' fashion.
- Once you have completed a 'W' with the Kettlebell, switch to passing it in an '8' fashion.
- For the rest of the set continue with passing it 'W' then '8'. So W, 8, W, 8...
- Keep working on form and balance and continue for several repetitions.
Variations:
- Try doing just a set of a 'W' style passes or '8' style passes. Do this if going W, 8, W, 8 is overly difficult.
- Try not rising at all with each pass and stay bent forward for the whole set.
- Try pushing the kettlebell out further letting is swing more.
About Manchester Gym
Located in the Green Mountains of Vermont, The Manchester Gym is the place to be for all your fitness and balance training needs. They offer personal training to get you on the right path, group fitness classes like Zumba, Cardio Boot Camp, Yoga and more; plus they have an impressive weight room with state-of-the-art equipment.
5 Worst Strength Training Exercises Every Athlete Should Avoid & Why
Like all the other sheep before me, in the last thirty years, I’ve been duped into using some, well …less than productive strength training exercises. It’s very easy to do when you aimlessly follow advice that’s either obsolete or biomechanically wrong to begin with. But today, through a better understanding of biomechanics and physiology, much more is known about how athletes can safely get the maximum benefits from strength training.
All athletics and physical activity cause micro-injuries (inflammation, muscle and tendon tears and increased joint wear) …it’s unavoidable and necessary because the recovery process from training is what actually makes you stronger. The most productive training exercises increase strength without pushing the body past the point of full recovery.
For some strength training exercises, if you’re not getting your information from an M.D. or preferably a PhD. in Biomechanics, Physiology or Orthopedics, you’re drinking a strength training ”Kool Aid“ recipe for disaster.
Performing strength training exercises using poor technique is bad, but the wrong exercises, even using the proper technique can be even worse.
The information here comes from first hand experience, research, the writings of Dr. William Wong, a Classical Naturopath, PhD. Exercise Physiologist and a World Sports Medicine Hall of Fame member. And from lengthy discussions with orthopedic surgeon Dr. Nicholas Bavaro from Rivertown Orthopaedics. So here we go.
5 Worst Strength Training Exercises for Athletes
1. Behind the Head Shoulder (Military) Press – A horrible exercise. ”The deltoids stop working at 90 degrees of abduction. That's about the starting position for this exercise! So what are you really working here? Your upper back some, and your triceps a lot. Your deltoids act as fixators; muscles that support the joint and allow movement to happen. But they do not act as prime movers or even agonists (in other words the deltoids don't do much here at all). What this exercise will do is to wreck the rear of your rotator cuff.“**
2. Straight-Legged Deadlifts - aka Stiff-Legged Deadlifts. One of the worst strength training exercises ever devised. ”These shear the ligaments at the sacroiliac joints which leads to excessive motion in the joint and pre-mature joint wear and tear. Straight-legged deadlifts also cause a crushing, shearing action on the lower spinal discs.“ ** Bottom line: You shouldn’t even be lifting a can of tuna this way, let alone an Olympic barbell loaded up with weights. Ixnay on the Del Rey for this exercise.
3. Behind the Head Wide Grip Pull Downs – Doing these (with the palms facing in) is bad. With the palms facing out, it’s even worse. Stop using this inefficient exercise now and switch to Front Pull downs, (palms facing you hands shoulder width apart, bar pulled to below the chin). You’ll see real strength gains and save your rotator cuffs.
Dr. Wong on the biomechanics: ”Most folks who train have what is called in biomechanics an anterior/posterior (front to back) imbalance. Your upper and middle back is supposed to be stronger than your chest or at least equal to it. Can you lat pull down as much as you can bench press? Didn't think so! Not many folks can, and yet the latissimus are three times longer, two times thicker and have a better bio-mechanical attachment onto the shoulder than the pectorals do!
So why are you stronger in the front than in the back? The answer is easy …For years you've been doing those dumb bodybuilding pull downs because of what the inexpert experts said.“**
4. Pull Ups/Chin Ups (With Palms facing Away From You) - These movements are not only bio mechanically inefficient they murder the rotator cuff, killing mostly the supraspinatus and terres muscles. There are many variations of the pulldown/pullup, but the most biomechanical efficient and thorough method is the one where your palms are facing your face (supinated) and are placed shoulder width apart on the bar. Wider grips endanger the rotator cuff of the shoulder as do the palms facing away (pronated) grip.
On biomechanics: ”The lats have 160 degrees of range of motion when worked in the sagittal (front to back plane), to do that, your palms need to be facing you to properly position your elbows. Turn your palms away from you and all of a sudden you are working on the transverse plane where the lats only have a 60 to 80 degree ROM.“
”Not only that, but without the bicep in the action your weak little elbow flexors will give out before the lats are saturated with exercise so the loss is doubled. It is from these wide grip and pronated grip pulldowns and pullups that many older weight trainers trash out their shoulders. The old wives tale of the lats having to work harder to make up for the biceps not being in the work would be true if the lats were connected to the elbow but they are not, they attach at the shoulder, so that often told exercise pointer is absolute biomechanical hogwash!“ **
5. Full Range of Motion Bench Press – These cause anterior shoulder tendonitis and rotator cuff injuries. The bench press is the single greatest destroyer of the rotator cuff in lifting. Its been proven that the floor bench press or 1/2 range of motion bench press guards against rotator cuff injuries while making you just as strong as the full range of motion exercise. Who knew?
So there you have it. The five worst strength training exercises and why you should avoid them like the plague. I’m sure some people will find this list surprising and even controversial, especially when it comes to the beloved bench press. But the information here should help you make better risk/reward decisions when it comes to strength training exercises.
** Dr. William Wong, a Classical Naturopath, PhD. Exercise Physiologist and a World Sports Medicine Hall of Fame member. If you would like to get more information about Dr. Wong’s training and health protocols, then visit his website at Totality of Being.
How to do Vew-Do Janda Sit-Ups, Janda Sit-Up Facts & History
First, the Janda Sit-Up up was developed by exercise physiologist Dr. Vladimir Janda. Dr. Janda is considered one of the world's leading experts on back problems. He's also a rehab consultant to The World Health Organization. They listen to him, so should you.
Janda's goal was to crack-the-code and develop an exercise to completely "isolate" the abs and eliminate the associated back problems caused by crunches and conventional sit-ups. A lot of the fitness community believes they're nailing down this back saving "ab isolation" with the crunch. Not true...
Irradiation, Muscle Function and Janda Sit-Up Facts
And here's why... The failure of crunches and sit-ups centers on a neurological phenomenon called irradiation. What irradiation does is spread contraction to nearby muscle groups through tension when a muscle is activated.
When he dug further, Janda realized the crunch, along with the conventional sit-up used the hip flexors (those muscles at the top of your thighs) as a lever to help raise your torso. That's not isolation, that's irradiation.
For a long time most people assumed the crunch was supposed to remove the hip flexors from the conventional sit-up. And eliminate the associated back problems because you're only partially raising the torso when performing a crunch.
But, the crunch only partially eliminates the hip flexors. Irradiation still recruits them to some degree during a crunch. The ab isolation problem wasn't fully solved with the crunch. If you want to understand this more...
Try this example of irradiation. Put your foot flat on the floor. Now make a fist with your toes. As you're doing this, you might think you're isolating the muscles in your foot. Not so. Try it again and you'll see you're activating more than your foot muscles. You'll notice other muscle contractions from the calf all the way up to your quads. What you've just experienced was irradiation at work. Now what?
Well, eliminating irradiation only solves half the isolation problem. Janda needed to recruit some other muscle group to activate the abs via the sit-up. And without causing irradiation from the hip flexors. He solved this with the human nervous system's principal of reciprocal inhibition.
The human nervous system's reciprocal inhibition relaxes the muscles opposite of the ones contracting. To relax the hip flexors, Janda needed to devise a trigger to perform the sit-up with muscles opposite to the hip flexors (the hamstrings and glutes) to isolate the abs without hip flexor recruitment.
Check this out. This is how he discovered how to remove the hip flexors, recruit the hamstrings and glutes and trigger "ab isolation." First, he placed his hands behind the subject's calfs. Then, he had the subject tighten the hamstrings and the glutes while their calfs were pressed up against his hands. He then had the subject perform a crunch and guess what happened?
Surprisingly, without anything to anchor the legs during the crunch, the only hip flexor recruitment is from the weight of your legs. When the Janda Sit-Up is done correctly, the abs rely on the hamstrings and the glutes (butt) as an anchor to achieve lift instead of the hip flexors. This almost totally isolates the abs during the sit-up. Pretty neat eh.'
How to Perform Vew-Do Balance Board Janda Sit-Ups
To perform a Janda Sit-Up using a Vew-Do Balance Board, there are a couple of prerequisites. First, you'll need to be the proud owner of a Vew-Do Indy, Flow, or Sk8 Balance Board. Second, get your paws on the Vew-Do Plyometric Training Rock System.


Look to get yourself in a seated position and face the sub-deck (underneath) side of the board which you place in front of you horizontally. Throw your feet over the board so they lay flat on the floor on the other side.
Now, lie back on the floor and scoot your butt until your knees are at a 90 degree angle. The backs of your calves should be up against the front of the board about halfway between your knee and your ankle and both feet should be flat on the floor.
Get ready and take a deep breath¡ you're about to wreak havoc on your abs. Cross your arms on your chest. Keeping your feet flat on the floor and your toes pointed, tighten your glutes (butt) and hamstrings, then slowly and without jerking, sit up (crunch) as high as you can. Then slowly lower yourself to your back. Take a deep breath and get ready for your next rep.


If you knock the board over by trying to pull your knees to your chest; that means you're not keeping your feet flat on the floor and you're trying to use the board as leverage. No good, you're doing it wrong. The exercise when performed correctly, isolates the abs without any enablers like your hip flexors. Your abs do all the work.
Your goal should be to do an ab pounding half sit-up or a crunch. Don't worry about trying to do a full sit-up. It's virtually impossible given the physics because essentially your legs become weightless. Plus, you're accomplishing the ultimate ab isolating exercise with a perfectly formed Janda Sit-Up.
Work Janda Sit-Ups into your core training with a goal of 5 sets of 3-5 reps. Once you build up a tolerance for the exercise you can add weight using 5 to 25 pound plates which you can lay on top of your upper abdomen. Keep the number of reps low with no more than 3-5 per set.
That's it, congratulations; you've just educated yourself on ab training and Janda Situps.
By: Rick Contrata
Vew-Do Balance Boards Free Plyometric Exercise Training Program
Plyometric exercise training and improving balance, coordination and other motor skills through proprioception is one of the fastest growing areas of core training. Try adding plyometric exercise training to your bag of tricks and see for yourself.
What is Plyometrics and how can you benefit from a plyometric exercise training program?
Plyometrics and plyometric exercise training programs are exploding from cult status to a necessity because it zeroes in on two missing links to modern day athletics - Sport specific core training and proprioception.
Plyometrics is the activity of rapid alternation of lengthening and shortening of specific muscle groups while resistance is continuously being applied to them. This lengthening and shortening cycle when performed in rapid succession allows the muscles to store some of the lost energy in the lengthening phase for use during the contraction phase.
The faster your muscles can perform this lengthening and shortening with resistance cycle, the more powerful your movements become. Strength + Minimal Time Factor = Power. That's the science of Plyometrics.
I could go into the scientific jargon of concentric and eccentric muscle contraction, but you will probably become as confused as I was as to which is which.
The benefit is deadly power, but other benefits also kick-in; strength, speed, agility, along with muscle memory and even endurance. Once you start using these plyometric training exercises, you will quickly find out why I have also mentioned agility and endurance.
Training in slow motion conditions your muscles to move in slow motion. Plyometric training injects speed into muscle memory with the value added benefits of power and agility
What is Proprioception?
Proprioception is often referred to as the sixth sense. Proprioception allows you to sense the positioning of parts of the body in relation to other parts of the body. Without proprioception you would not be able to put a forkful of food in your mouth, walk or swing a baseball bat without visually watching your limbs doing it.
There is a lot of misinformation about proprioception. Proprioception is not a skill, it’s a sense… much the same as the sense of smell is not a skill.
Proprioception is your body’s enabler for learning and perfecting motor skills like balance and coordination. Proprioception allows you to improve coordination and balance through repetitive drilling… and nailing it all down as muscle memory.
Have you ever heard the expression once you learn how to ride a bike, you never forget how? That's proprioception at work. Once a task is learned, it's programmed into body movements automatically as motor skills through muscle memory.
In other words, it enables you to remove the thought process. You don't think about it, you just do it.
Plyometric Exercise Training and Proprioception
The Vew-Do Balance Board Plyometric Training Exercises I’ve developed are easy to master and will have a radical effect on your core training. Many of these exercises were also designed as sport specific training drills to help perfect motor skills through proprioception.
Many of the exercises in this program are sport specific. The exercises movements mimic real-world actions. They transform them from just exercises to sport specific drills that helps develop muscle memory through proprioception.
Which sports benefit from plyometrics and plyometric training programs?
Just about any athletic activity or rehabilitation program would benefit from some form of Plyometric exercise training, but I’ll break the benefits down into two specific groups: Active or Dynamic Resistance and Passive or Static Resistance. Active resistances are outside forces with continuously changing levels of tension. Passive resistances are outside forces that remain relativly constant.
The list of active resistance sports includes wrestling, football, rugby, boxing, martial arts and related combat sports.
Some of the other sports include Football, Boxing, Rugby, Martial Arts, Swimming, Power Lifting, Gymnastics and some Track and Field events like the Shot-Put, Pole Vaulting and even Tennis.
The list of passive resistance sports includes most team sports like basketball, baseball, soccer and lacrosse, skiing, snowboarding, cycling, surfing and track and field events.
This plyometric exercise training program comes with a couple of warnings though... First, plyometric training exercises are not for couch potatoes or weekend warriors. Paticipants should be at an advanced level of health and physical fitness before jumping into plyometrics.
Second…They are not warm-up exercises. Do not even attempt to try plyometric training exercises until your body is sufficiently stretched out and warmed up.
The exercises in this program are design to be performed using a Vew-Do Balance Board and Vew-Do's Plyomeric Rock Training System shown below.
How to set up a Vew-Do Balance Board for Plyometric Training Exercises
Setting up your Vew-Do Balance Board for plyometric training is easy. First, find a place clear of large objects like furniture, walls and pieces of exercise equipment. To reduce the impact on joints like knees, ankles and shoulders, use an exercise area with carpeting or some other dense cushioning material like a wrestling, yoga or exercise mat.
Using 2 plyometric training rocks (aka teeter rocks) place the rocks (flat side to the floor) at stop ends of the Vew-do Balance Board sub-deck. Be sure that the Board’s center rail fits snuggly in the slots of the teeter rock and up against the stops at each end of the board….Ta da…..you’re done! Let’s rock n’ roll…


Vew-Do Balance Board Lateral Pancake Board Jumps
None of these exercises can be considered warm-ups, but pancake box jumps are the closest thing you’ll see to a warm-up exercise in Plyometrics. The term “pancake” is derived from the fact that the balance board lays on a flat surface like a pancake. You don’t use the Vew-Do plyometric training rocks for this exercise.


Stand alongside the center of the board facing the vertical length of it. Slightly coil your legs and jump laterally to the other side of the board, repeating this motion from one side to the other. This is a speed burner. The trick to perfecting this exercise to take just enough air to clear the board before coiling your legs for the next jump. After landing, spend as little amount of time on the ground as possible.
Another variation to this is the Vertical Pancake Board Jump. Stand alongside the center of the board, but face horizontally across it. Coil up, jump vertically across the board to the other side and then jump back to your original position. Remember that you’re looking to increase foot speed, so limit the amount of air you take on the jumps. You want just enough to clear the board on landing and prepare for the next jump.


Sport Specific Benefit – Low-impact Plyometric exercise for developing power and increasing foot speed. This exercise is effective for every physical activity including rehabilitation.
Vew-Do Balance Board Lateral Box Jumps - Now we’ll start to get into some serious plyometric training. The box jump is a simple yet effective plyometric exercise. The term “box” is used because this exercise is commonly done using a wooden box. There are lots of fancy box jumping apparatus on the market; usually the only benefit is increased height. The problem is, about the only other thing you can use them for other than plyometrics is possibly doubling them as a seat or a snack table.
Stand alongside the center of the board facing the vertical length of it. Slightly coil your legs and jump laterally onto the board, bend your knees, coil and jump off the board on the opposite side. Reverse the sequence of floor, to board, to floor again returning to your starting position.
This is a speed exercise. You’ll need to add some air to your jump to make it onto the board and remember to keep your feet close together. Try to use as little time as possible to land and prepare for the next jump. The 3 step sequence of the box jump will also help your coordination, muscle memory and endurance.


Vew-Do Balance Board Vertical Box Jumps - Stand alongside the center of the board, but face horizontally across it. Coil up, jump onto the board, bend your knees, coil and jump off the board to the opposite side.
Continue facing the same direction after your landing. Reverse the sequence by jumping backwards onto the board, bend your knees, coil and jump backwards again off the board to your starting position.


Sport Specific benefit – Increased power and foot speed is an almost universal benefit, but is critical for the following athletes because it adds balance and agility. Football players, boxers, wrestlers, soccer players, surfers, skiers, snowboarders, skateboarders and martial arts.
Vew-Do Balance Board Carving Jumps – Do you often need to change your body position laterally? How about being able to do it with more quickness, power and agility? If your sport requires aggressive lateral movement, this plyometric carving jump exercise will help you kick-in that extra split-second burst of power. The added benefit is balance training.
Stand at one end of the board facing horizontally across it. Coil and jump laterally onto the center of the board. Immediately coil and continue jumping laterally off the board to the other end. Continue facing the same direction and reverse your jumping direction back onto the board. Immediately jump again laterally off the board to your original position. Spend as little time as possible on the floor or the board. The goal is to develop a short quick carving technique.


Sport Specific benefit – Any sport where carving and lateral movement is important. This includes all your board sports like snowboarding, skiing, skate and wake boarding as well as surfing and skating. Also helpful for soccer and football players especially positions where you need quick lateral movement. Running backs, receivers, defensive backs and linebackers are the beneficiaries.
Vew-Do Balance Board Grand Amplitude Carving Jumps – This is where the rubber meets the road. “Grand Amplitude” in wrestling is quickly elevating your opponent and taking them from their feet to their back in a wide arc. This exercise requires the same wide arc and will hone your carving ability along with some serious balance, agility and endurance skills.
Using the same body position as the carving jump, keep your feet together, coil your legs and jump laterally in a wide arc across the length of the board. Adjust your body position in mid-air to absorb the impact of the landing and to position yourself for the next jump. Make sure you use enough power and get enough air to clear the entire length of the board. Landing should be done cleanly and without any hopping or extra steps.
Immediately coil your legs and jump the length of the board to your original position. Land cleanly and prepare to jump to the other side of the board. The key to performing this exercise correctly is your old friend proprioception. You must change your body positioning in mid-air to have the ability to land cleanly without any extra steps.


Sport Specific Benefit – Any athlete that needs powerful lateral changes in body position. Skiers, snowboarders, surfers, skateboarders, hockey and figure skaters. Running backs, receivers, defensive backs and linebackers in football. Soccer players, wrestlers and gymnasts.
Vew-Do Balance Board Diamondback Jumping Jacks – I call these “Diamonds backs” because the foot postioning resembles the four corners of an imaginary diamond. This is one of the harder exercises for coordination. I suggest walking through this exercise slowly at first to develop some muscle memory before you step it up to full speed.
Stand alongside the center of the board, but face horizontally across it. Coil up, jump onto the board. After landing on the board, jump up vertically and land spread eagle with your legs on the outside of each end of the board. (You can cheat a little by landing on the same side of the board as you started, but spread your legs as far as you can.) Jump back onto the board with your feet together.
The next move is to jump forward in front of the board. Then jump backwards back onto the board with your feet together. Jump up vertically again and land spread eagle with your legs across the length of the board. Jump back onto the board with your feet together and then jump backwards off the board to your original starting position. You can enhance the effectiveness of this exercise by raising your arms above your head during the spread eagle jumps, just like a regular jumping jack.
This exercise requires coordination, balance and muscle memory. You’ll feel a little awkward until you get the sequence mastered, but you’ll appreciate the results.


Sport Specific benefit – Any sport that requires balance, coordinated foot movements and speed. Best examples are soccer, wrestling, hockey and figure skating, martial arts and boxing.
Vew-Do Balance Board Extreme Squat Thrusts – This exercise takes the classic squat thrust and adds an aerial component along with additional arm movement. Don’t be fooled by the looks of this. You’ll feel some serious arm burn doing these.
Squat down and face across the board. Place both hands down on the board, shoulder length apart. The first move is to uncoil your body and assume a push-up position. Coil up and return to your starting position.
While facing the same direction, jump up onto the board while raising your arms above your head. As soon as you land on the board, immediately jump up again, jumping slightly backwards off the board while raising your arms above your head and return to the original squat position. Repeat the cycle.


Sport Specific Benefit – This is an all-around plyometric training exercise. It works the legs, abs, and arms. Best bet for full body sports like gymnastics, wrestling, martial arts and swimming.
Vew-Do Balance Board Vertical Riot Bomb Push-Ups – How about a plyometric exercise carved from a modified “jailhouse” push-up. Forget about clap or Japanese style push-ups. They’re no comparison to this street-tough arm burner. Don’t try this exercise if you have any shoulder or rotator cuff problems.
Assume the standard push-up position, facing across the board with your arms shoulder length apart and the board in front of you. Coil down and push up quickly using the spring in your arms to get enough air to land on the board.
Perform another push-up, this time landing with your arms in front of the board. Reverse the sequence backwards onto the board again and finish the cycle with another push-up off the board and return to your starting position. Make sure you absorb the landings by bending at the elbows to relieve the impact strain on the shoulders.


If you ate your “Wheaties” you can try this variation of the Vertical Riot Bomb. Skip the push-up onto the board and vault your arms across it. Be aware that you’ll need enough air to clear the board and land on the other side. Reverse the sequence and vault back to the starting position.
Sport Specific Benefit – Any sport which requires straight ahead, powerful arm thrusts to create separation between you and your opponent or another object. Best bet for boxing, shot-put, gymnastics, wrestling, martial arts, defensive and offensive linemen in football to name a few.
Vew-Do Balance Board Lateral Riot Bomb Push-Ups – This exercise adds lateral movement to a standard push-up and something else. It requires you to torque your mid-section during the push-up phase. With some sports, it’s all about pushing people or objects around. That requires powerful arm thrusts while simultaneously using torque from your hips and abs. Stay away from this exercise if you have rotator cuff or shoulder problems.
Face your body along the vertical length of the board, with your shoulders lined up with the center and take a close-hand push-up position. Coil down into your push-up. As you vault up onto the board, torque your hips slightly to change your arm position and land on the board with your hands.
coil into another push-up from the board, and torque your hips to land on the opposite side of the board. Reverse the sequence and the hip torque to return to your original position. Make sure you absorb the landings by bending at the elbows to relieve the impact strain on the shoulders.


Another variation of this exercise is to skip the push-up onto the board and just arm-hop from one side of the board to the other. May the force be with you on that one.
Sport Specific Benefit – Here’s a partial list sports that could benefit from lateral riot bombs. Pole vaulting, wrestling, offensive and defensive linemen in football, shot-put, discus, hammer-throw, javelin and gymnastics.
Vew-Do… “Balance Without Limits" ™
By: Rick Contrata